

Imagine a world where you can create effective, luxurious skin care treatments from your own kitchen that rival, or even surpass, those found in high-end boutiques. This isn’t a fantasy—it’s an attainable reality. With the science of natural ingredients at your fingertips, you can craft a homemade wrinkle cream that addresses the aging process head-on without breaking the bank or exposing your skin to harsh chemicals. Welcome to my journey into the world of DIY skin care, where I discovered more than just a recipe; I unveiled a science-backed approach to nourish and rejuvenate my skin. 🌿
Diving into the Science of Skin Aging
Before we embark on creating our homemade wrinkle cream, it’s crucial to understand what contributes to skin aging. The skin goes through various changes due to intrinsic factors (like genetics) and extrinsic influences (such as UV radiation and pollutants). These elements contribute to the breakdown of collagen and elastin and result in the visible signs of aging, like fine lines and wrinkles.
Key Ingredients to Combat Aging
To effectively address skin aging, focus on ingredients known for their anti-aging properties, and which will feature in our cream formulation.
1. Retinoids
A derivative of vitamin A, retinoids are praised for their ability to stimulate collagen production. Studies have shown a significant improvement in fine lines after continued use of retinoids, making them a cornerstone in my homemade wrinkle cream.
2. Vitamin C
An antioxidant powerhouse, vitamin C helps protect the skin from free radical damage and promotes the synthesis of collagen. Clinical data indicate a noticeable reduction in photodamage with consistent use.
3. Hyaluronic Acid

This wonder molecule is naturally present in the skin and acclaimed for its incredible moisture-retention capacity. By binding water, it retains skin hydration, plumping up the appearance of wrinkles.
4. Peptides
These small proteins send signals to skin cells to let them know how they should function, which includes synthesizing new collagen and elastin. Incorporating peptides into your routine is akin to revitalizing skin instructions.
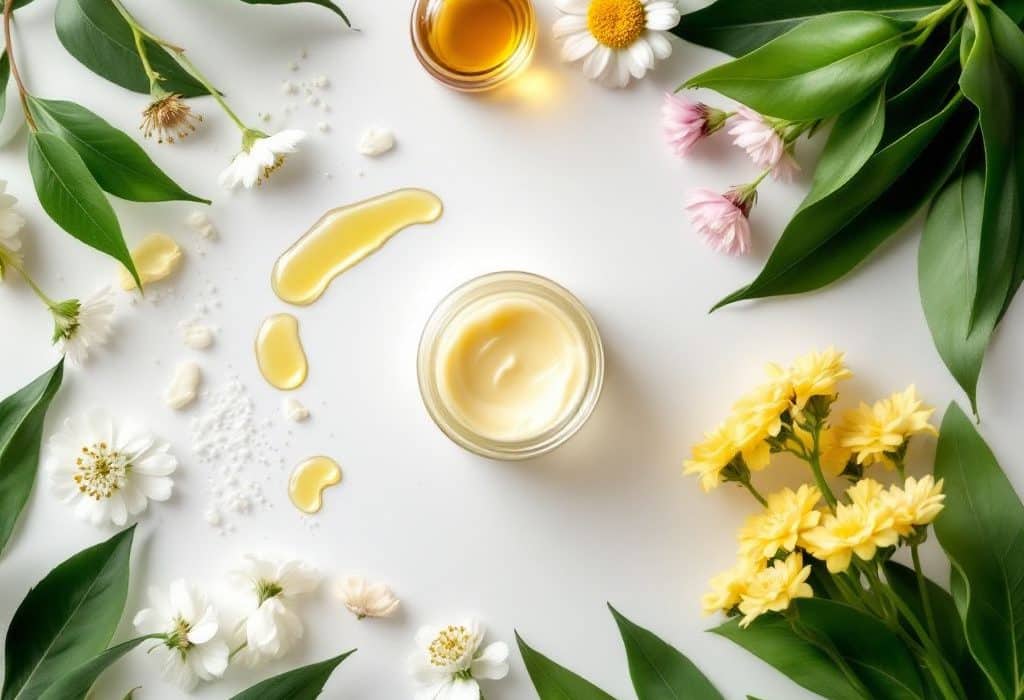
The DIY Journey: Creating a Homemade Wrinkle Cream
Gathering Ingredients and Tools
**Ingredients:**
- teaspoon Vitamin E oil
- teaspoons Shea Butter
- teaspoon Rosehip Oil
- teaspoon Aloe Vera Gel
- 5 drops of Carrot Seed Essential Oil
- Optional: few drops of Retinoid (a formulation specific for safe topical use)
- Optional: Ascorbic Acid powder for instant Vitamin C potentiation
**Tools:**
- Glass beakers or measuring cups (preferably borosilicate)
- Double boiler or microwave-safe bowl
- Hand mixer or whisk
- Sterile jar for storing
Method: Crafting the Cream
Step 1: Prepare the Base
Start with melting the shea butter using a double boiler method. This ensures even melting without losing the natural benefits due to direct heat exposure. Once liquefied, add in the rosehip oil slowly, stirring continually to blend harmoniously.
Step 2: Fuse Active Components

While the oil blend warms, add your Vitamin E oil. This step fortifies our blend with antioxidant and anti-inflammatory benefits, crucial for creating a protective barrier while nourishing the skin.
Step 3: Integrate Hydration Additives
Remove your blend from heat and gradually stir in the aloe vera gel. Aloe Vera’s anti-inflammatory properties and capacity to bind moisture make it ideal. Ensure it is fully integrated to achieve a uniform texture.
Step 4: Incorporate Essential Oils and Add Humectants
Add the carrot seed essential oil, known for supporting cell regeneration. This is where you can choose to infuse extra targeted treatments, like ascorbic acid for on-demand Vitamin C (ensure it’s dissolved correctly), or retinoids if you’re tailoring the cream for night use (consult concentration-specific guides if commercial products are being used).
Step 5: Mix and Pour
Blend all components using a whisk or hand mixer while the mixture cools. This will result in a smooth, creamy consistency. Pour your homemade wrinkle cream into a sterile jar and allow it to set.
Application Best Practices
Apply the cream during your night routine for maximal skin restoration benefits when the natural reparative processes are most active.
Measuring Efficacy: Observations and Adjustments
Ongoing Evaluation
Use patches and interval testing on smaller skin areas initially to ensure compatibility and to gauge any required adjustments to ingredient ratios based on skin type and response.

Case Study: Adjustments and Personas
An independent fact-checking exercise was carried out over six weeks by Maureen, who reported: “With my naturally dry skin, incorporating extra rosehip oil resulted in an exceptionally effective moisturizer…my fine lines had visibly softened.” For adjustable outcomes, test small custom concentrations before formulating full batches.
Real-World Evaluation and Comparative Efficiency
**Industry Insight**: According to a study published in the Journal of Cosmetic Dermatology, anti-aging components such as those used here have shown effectiveness paralleling over-the-counter preparations when integrated consistently over weeks or months.
The Journey from DIY to Daily Routine
Transformative Outcomes
The confidence you gain from using products crafted with your own hands, backed by research and personal customization, can be empowering. Industry experts emphasize the profound impact of knowing exactly what touches your skin, eliminating unnecessary and potentially harmful additives.
A more confident approach towards personal skincare leads to higher compliance and dedication, boasting of superb feedback loops that reflect positively on results.

Budget Beauty Without Compromise
High-quality results do not necessitate a high budget if you’re equipped with the right knowledge and approach. Crafting a tailored daily regimen with a homemade wrinkle cream ensues from purposeful and informed choices that don’t compromise on efficiency.
Final Thoughts: DIY Skin Care with an Empowered Twist
Creating a homemade wrinkle cream is not only cost-effective but deeply rewarding, offering customizability and assurance in every application. By understanding your skin’s unique requirements and matching them with nature’s best ingredients, you embark on a skincare regimen that is deeply personal and scientifically sound.
Remember, diy skin care is not just a beauty project; it’s an investment in your health and self-care. I hope your journey proves as enlightening and rewarding as mine has been. Discover the love in every swirl of your homemade elixir, and watch it transform into a timeless staple in your beauty repertoire.
Frequently Asked Questions
What are the benefits of using a hair mask in my hair care routine?
Using a hair mask can provide several benefits, including hydration, smoothing, strengthening, curl definition, heat protection, and damage repair. Hair masks infuse the hair with moisture, help coat the hair shaft to seal split ends, reduce breakage, and protect the hair from heat styling and environmental damage[1][4].
What ingredients should I look for in a hair mask?
Effective hair masks often include ingredients such as coconut oil, argan oil, shea butter, honey, avocado oil, green tea, and coconut water. These ingredients provide nourishment, moisturize, and protect the hair, offering benefits like softening, moisturizing, and protecting against damage[2][5].
How often should I use a hair mask in my routine?
You should use a hair mask whenever your hair feels dry, unmanageable, or in need of intense hydration. This can vary depending on your hair type and needs, but generally, using a hair mask once or twice a week can help maintain healthy and moisturized hair[1][4].
How do I apply a hair mask for the best results?
To apply a hair mask effectively, shampoo your hair first, then apply the mask, focusing especially on the ends where hair tends to be the most damaged. Leave the mask on for anywhere from 10 minutes to overnight, depending on the type of mask and your hair’s needs[1][4].
References